Joanna Kinnersly-Taylor: Tool kit
‘Tool kit’ is a new series for TextileArtist.org.
Each edition will explore some of the primary tools used by our favourite textile artists, including descriptions of the item, brand name, specific models, and year, if applicable.
In this third edition of ‘Tool kit’ we get a firsthand look at some of the most valuable equipment used by Joanna Kinnersly-Taylor.
To see the previous editions, have a look at:
Rachel Parker: Tool kit
Nigel Cheney: Tool kit
Item 1 – Dip pen
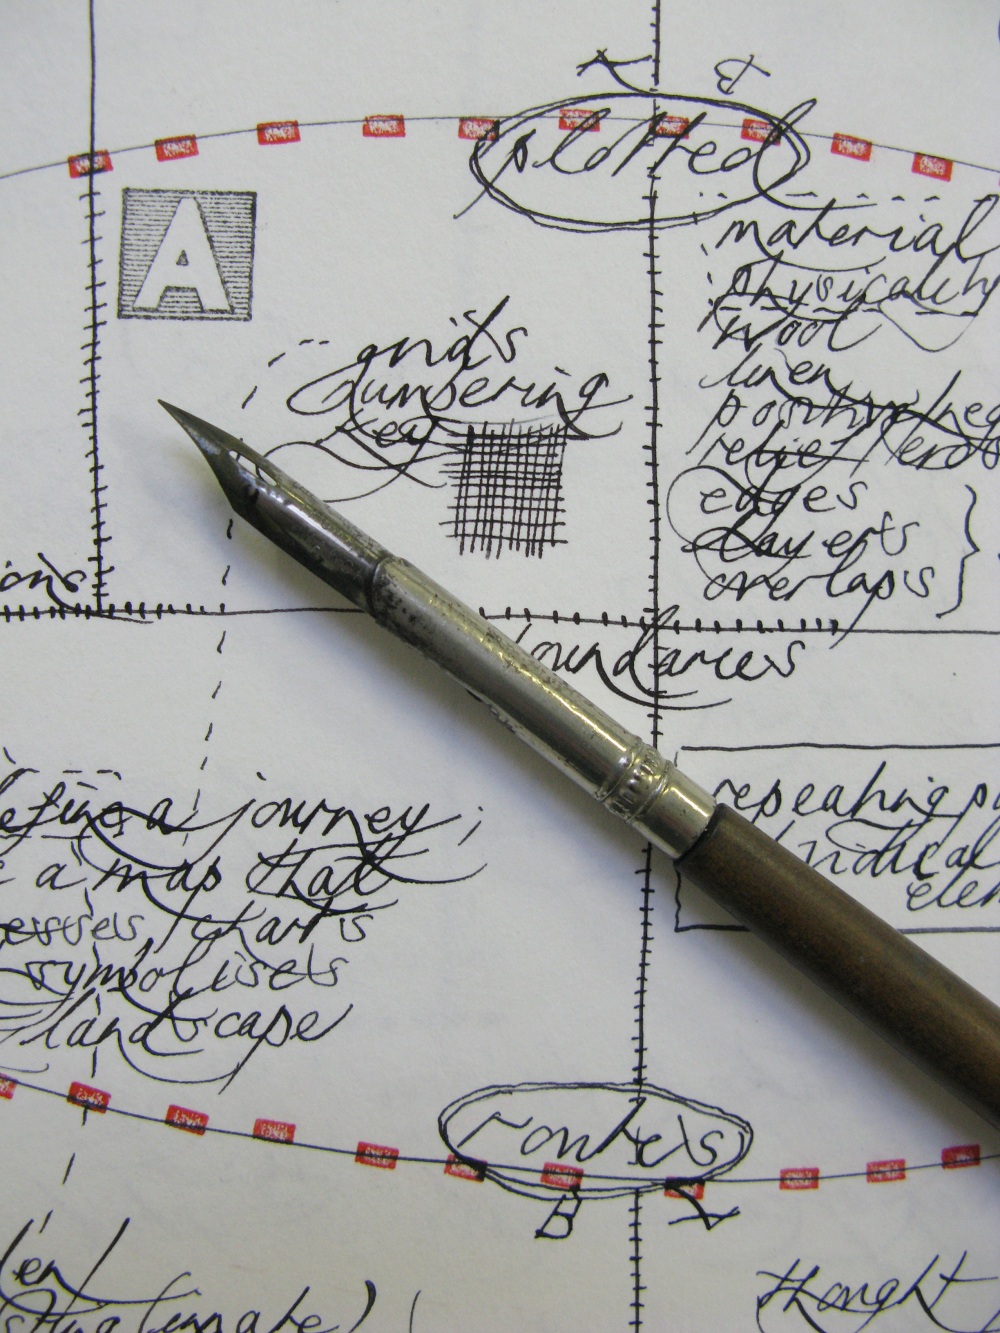
Dip pen
Description: Wooden handle with metal fitment for nib.
Year: Unknown; it belonged to my grandmother.
How do you use this item in your practice?
It’s the first tool I reach for when starting a new project. I use this nib pen to map out and clarify my creative thoughts.
Why do you use this specific item?
I like the feel of the nib, the way it writes – it suits my handwriting. The fact that it needs to be repeatedly loaded with ink slows me down sufficiently to prevent random scribbling, instead encouraging a refinement of thought process. The fact that it belonged to my grandmother gives my creative journey extra resonance.
Where did you buy it from?
A much-loved item passed down from my artist grandmother.
Item 2 – Coat trough
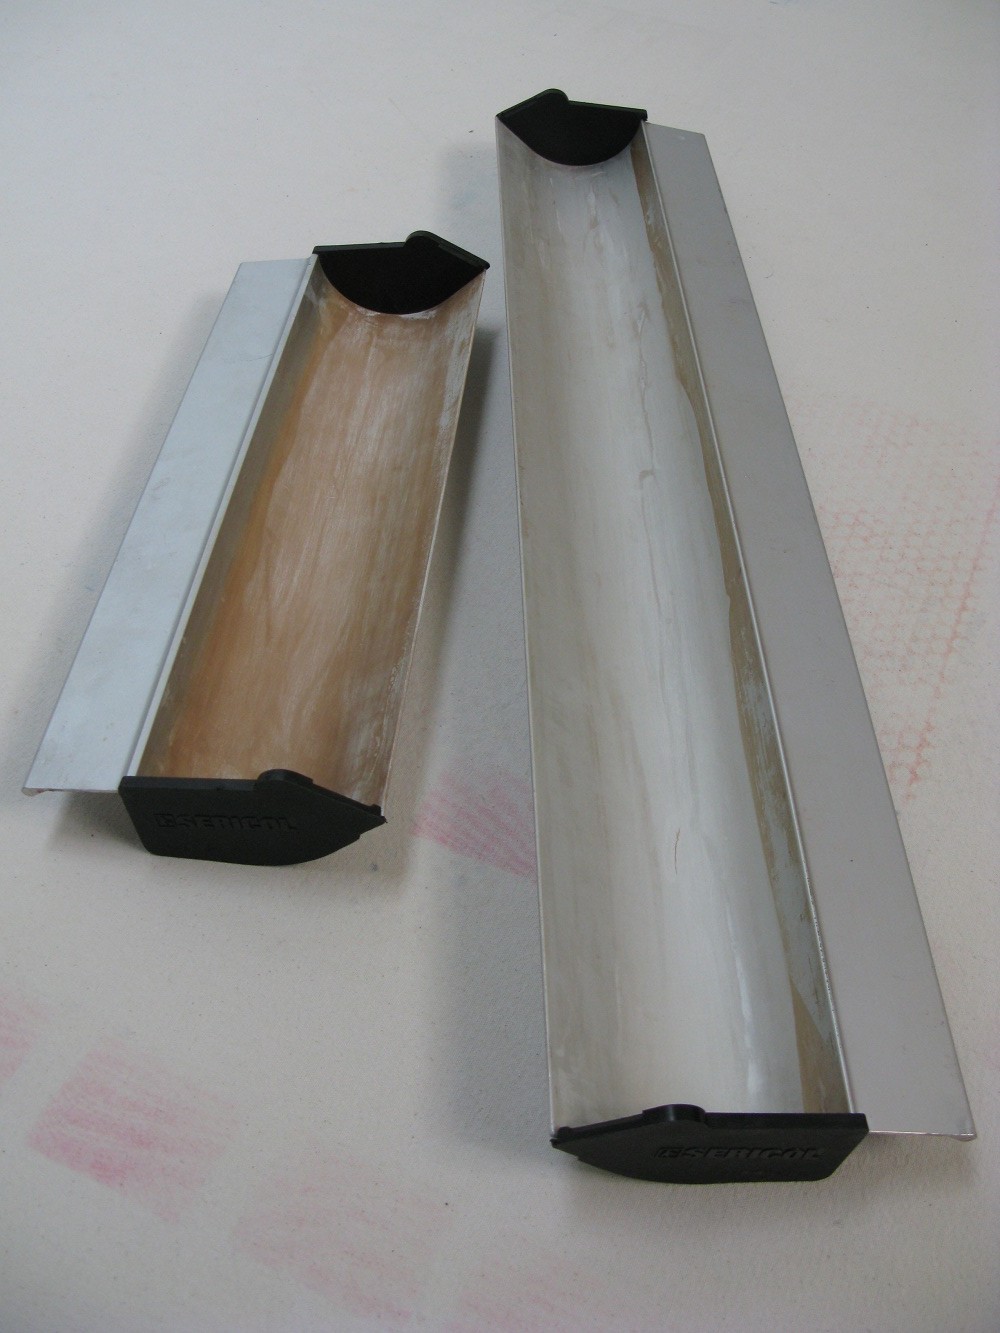
Coat trough
Brand: Sericol
Description: Aluminum with plastic ends.
Year: 1989
How do you use this item in your practice?
For applying light-sensitive emulsion to the screen prior to exposure.
Why do you use this specific item?
This looks a very unexciting implement, but is absolutely essential for the even application of emulsion. Without a properly coated screen, the image will not transfer satisfactorily or be durable. It must be cleaned thoroughly immediately after use, so the coating edge stays sharp.
Where did you buy it from?
Sericol – I don’t think they make them any more, but beware cheap imitations! If the ends don’t fit snugly and flush with the trough, applying an even coating won’t be possible.
Item 3 – Precision scales
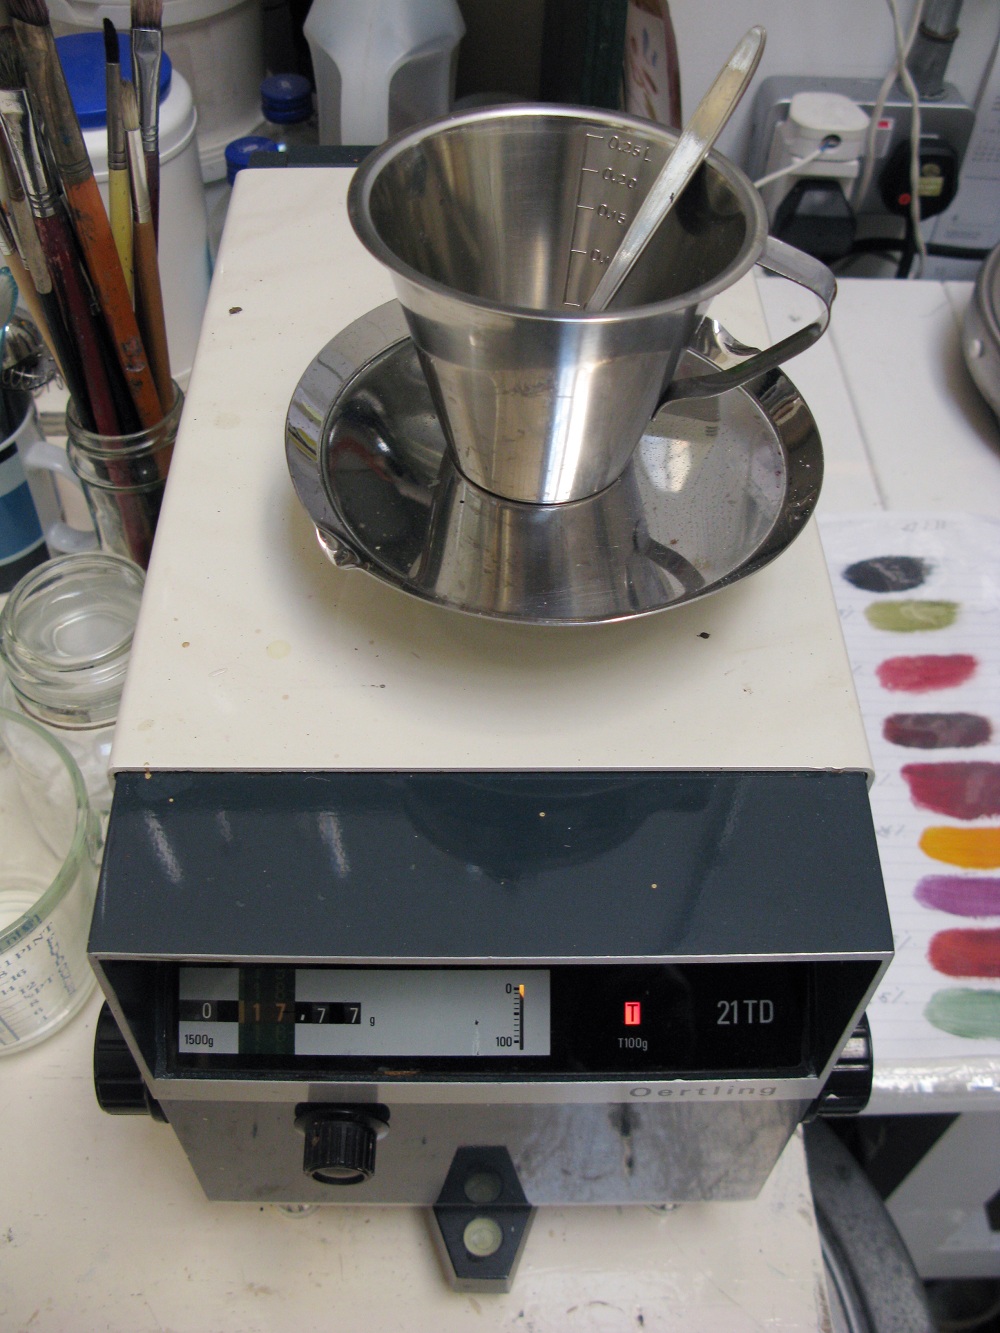
Precision scales
Brand: Oertling
Model: 21TD
Year: Circa 1970
How do you use this item in your practice?
Weighing dyes and other auxiliary ingredients.
Why do you use this specific item?
These analogue scales weigh to hundredths of a gramme, which is essential for accurate and repeatable colour mixing. They also have a ‘tare’ facility, which means you can reset to zero after placing a vessel such as jug or beaker onto the scales, or after adding each ingredient. They are very reliable and I simply couldn’t function in the studio without them!
Where did you buy it from?
I was lucky enough to come by these when Caledonian University in Glasgow were upgrading to digital scales in their labs.
Item 4 – Screen clamps made from mild steel
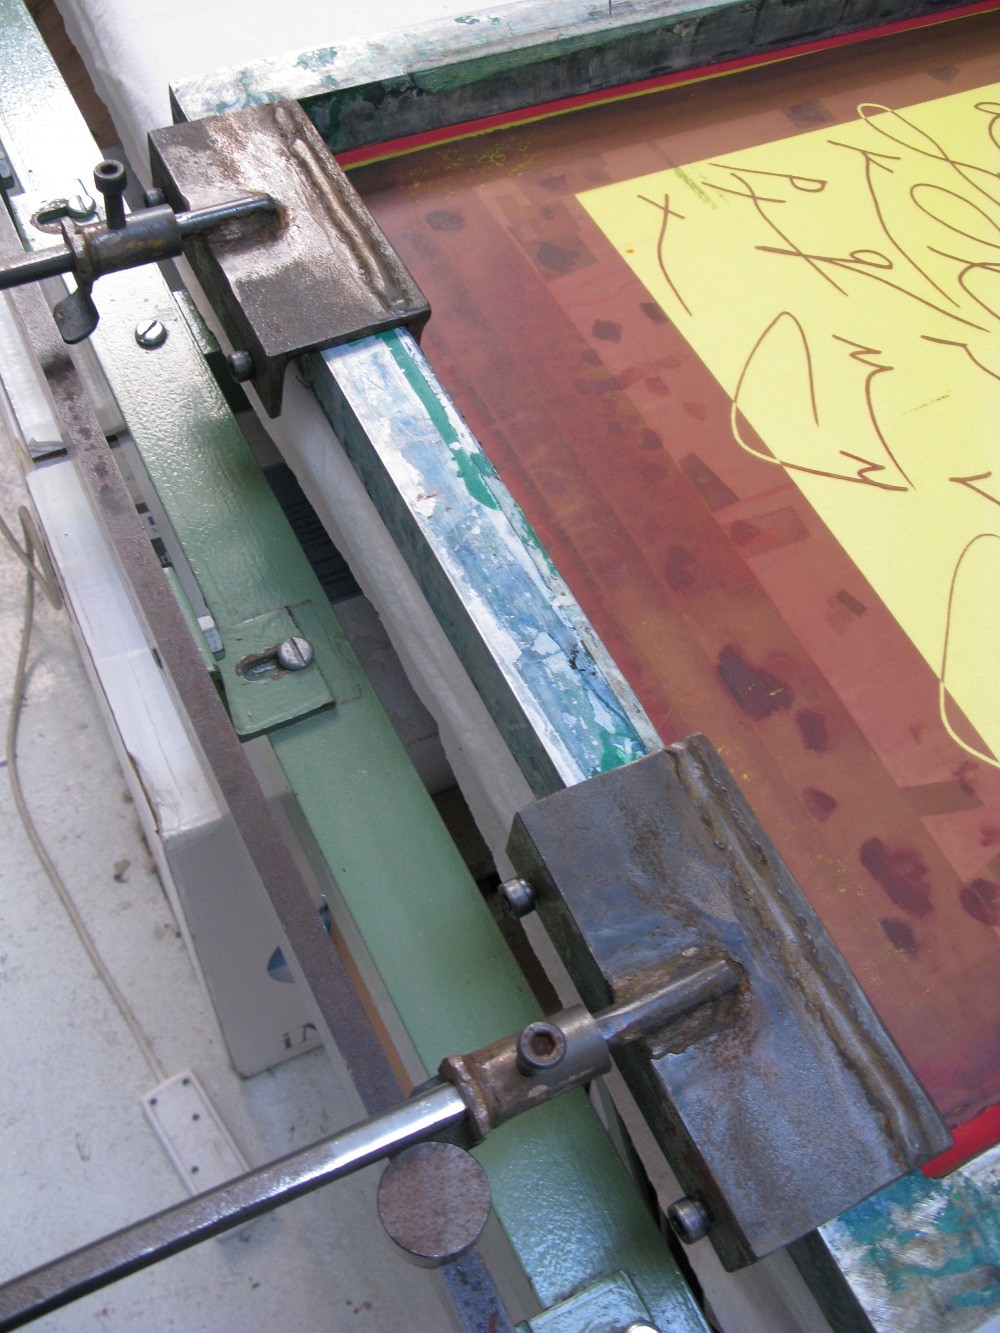
Screen clamps made from mild steel (a)
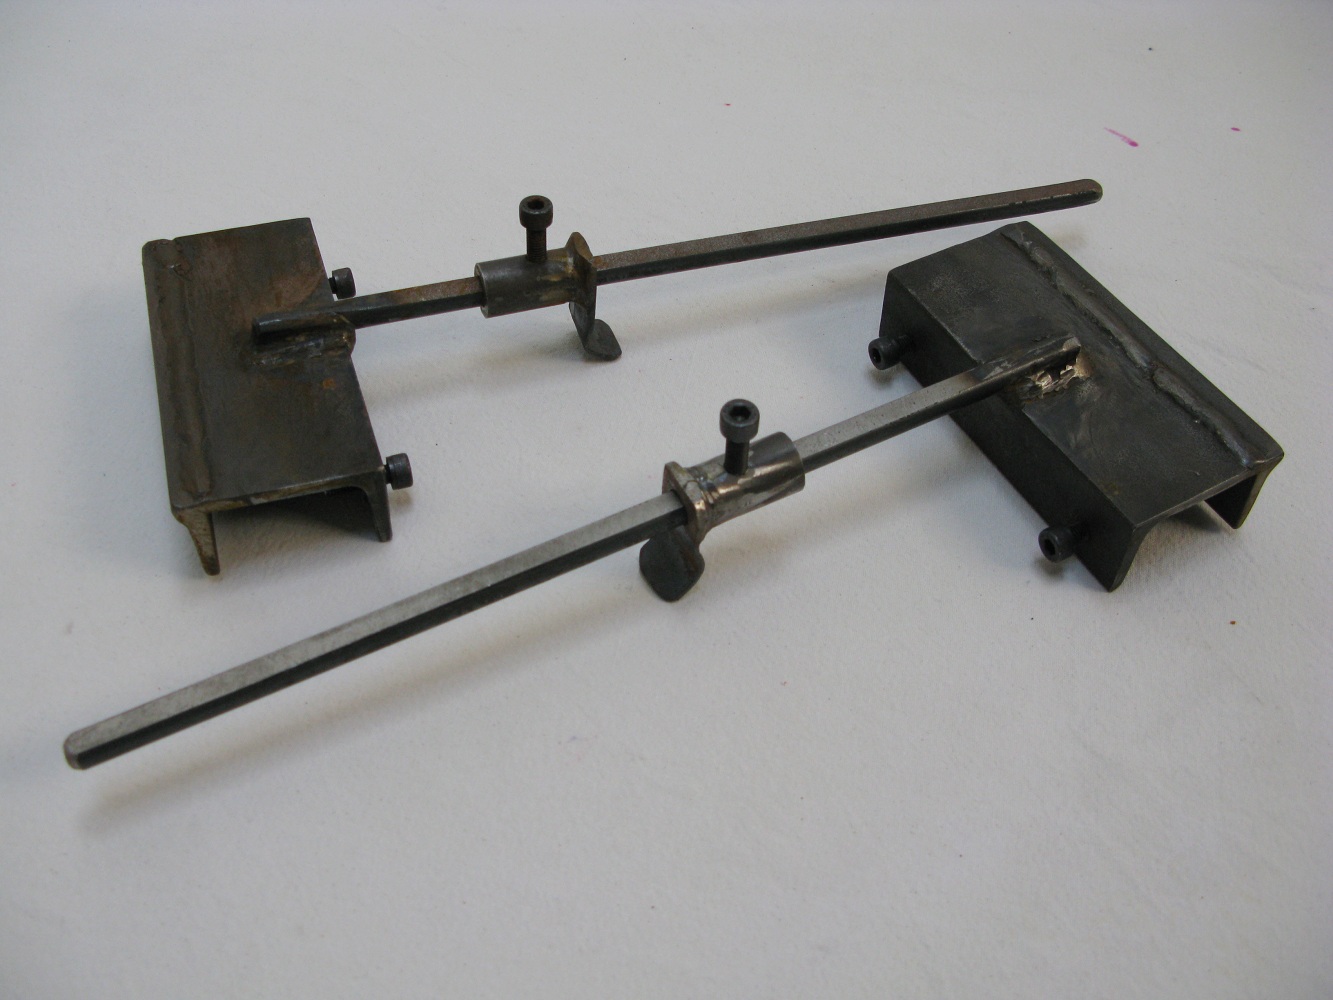
Screen clamps made from mild steel (b)
Brand: This was made by my sculptor husband, Joe Ingleby, and based on design adapted by the late Ivor Laycock. Laycock was formerly head technician in the Department of Textiles at Glasgow School of Art.
Year: ~ 2006
How do you use this item in your practice?
These brackets attach to the screen, enabling it to be positioned securely against the stops on the registration rail that runs down the length of the print table, allowing for printing a repeat.
The clamp can be adjusted to fit screen frames of varying depths, so I can utilise it on my older, wider screens as well as newer aluminum ones. The long flat-topped rod butts up against the stops and there is a‘tube with a L-shaped plate welded on, which slides along the rod. This enables the screen to be positioned at the correct distance from the edge of the print table. All the bolts are adjusted with Allen keys.
Why do you use this specific item?
The clever design of the clamp means it will fit both metal and wooden screens of varying frame depths, without any need for permanent fixings into the frame. The mild steel construction makes the clamps quite heavy and this helps weigh the screen down, aiding stability during printing.
Where did you buy it from?
The late Ivor Laycock, formerly head technician in the Department of Textiles at Glasgow School of Art had a wealth of experience and devised these wonderful clamps. My husband Joe Ingleby, a sculptor, made three pairs for me from mild steel, replicating Ivor’s clever design.
Item 5 – Squeegee
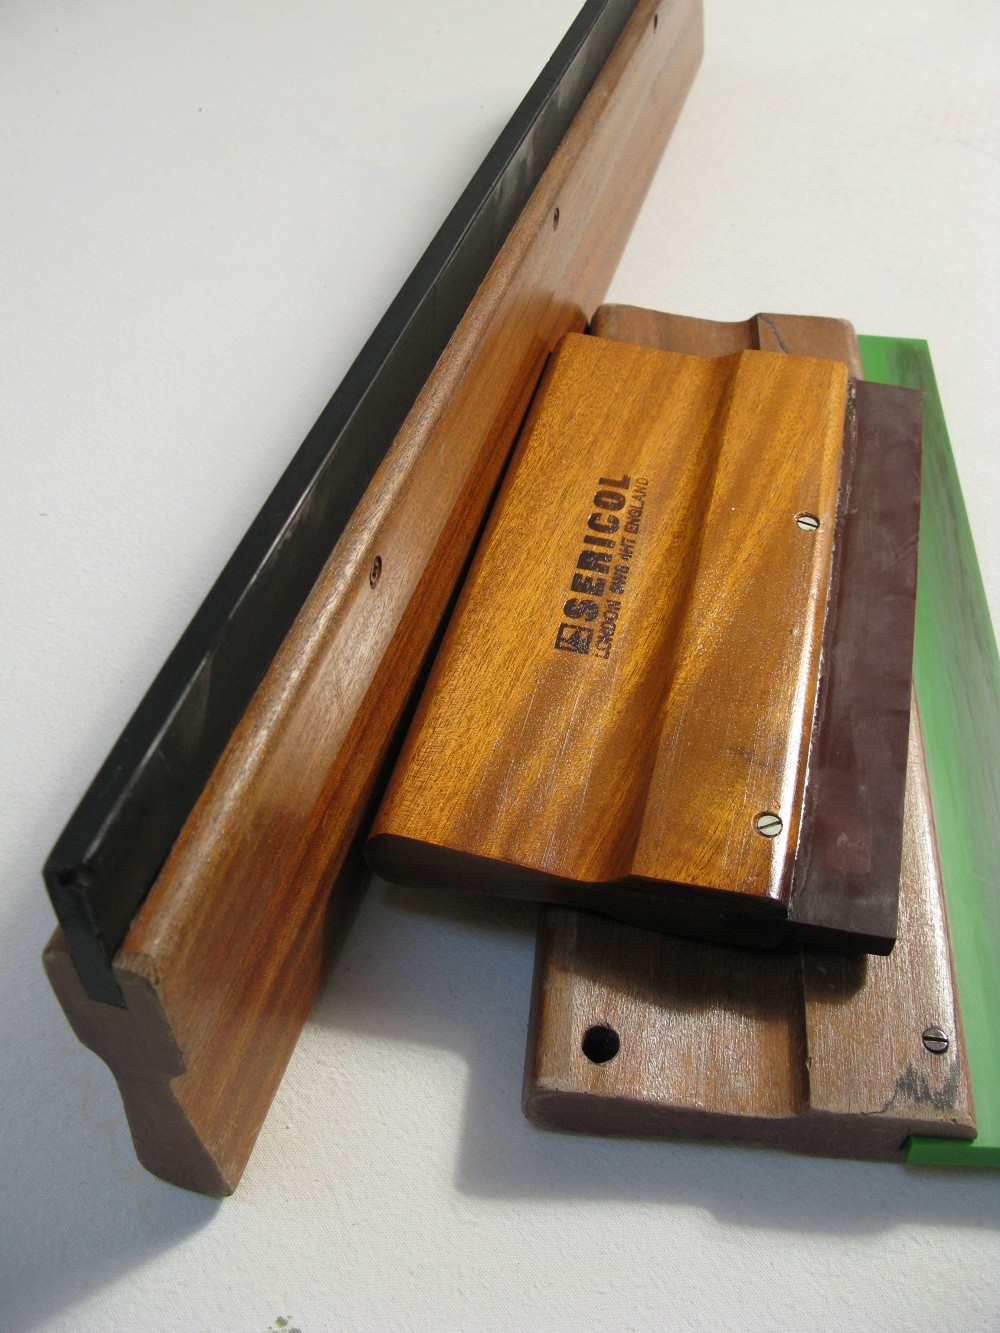
Squeegee
Brand: Sericol
Description: Mahogany handle, square profile blade, and medium hardness.
Year: 1989
How do you use this item in your practice?
To enable the ink to be pulled evenly and smoothly through the screen mesh and transferred onto the cloth, the squeegee is held firmly at an angle of about 45 degrees to the screen, with hands about a quarter of the way in each side. The first pull is normally done towards you for ease, with the angle reversed on the return pull. The number of pulls depends on the design, substrate, blade type, blade hardness, and ink consistency.
Why do you use this specific item?
We used Sericol squeegees at college and I like the weight and depth of the mahogany handle – it’s comfortable to hold and you don’t get your fingers in the ink. It’s varnished, so is water-resistant and therefore very stable – there is no warping or swelling to the wood with the constant wet and dry conditions.
Where did you buy it from?
Sericol, Parsons Green, London
Sadly, these are no longer made, but since these handles are second to none, I have gradually replaced the blades as they have worn out. New blades don’t match the feel of the old ones, so it’s a bit like breaking in a new fountain pen each time.
Read our interview with Joanna:
Part 1 – Joanna Kinnersly-Taylor interview: Printed textile art
Part 2 – Joanna Kinnersly-Taylor interview: The shape of things
To get in touch with Joanna or for more information, please visit: www.joannakinnerslytaylor.com
Let us know us know if you’ve been enjoying our new series ‘Tool kit’ by leaving a comment below.


I’m loving this series! So interesting to learn more about what artists use and how they use it. The pen is especially moving…
Love these articles.. Job well done…. Work in practice.