Ann Brauer: Tool kit
- Category Toolkit
-
Ann Brauer has been combining the traditions of quilt making and contemporary concepts of art to create her abstract landscapes for the last 34 years.
In this article, Ann selects 5 tools that she uses to make her beautiful designs. We learn about their place and importance in her practice, where to purchase them and Ann gives her insight into the benefits of each item.
Ann Brauer, Sewing machine
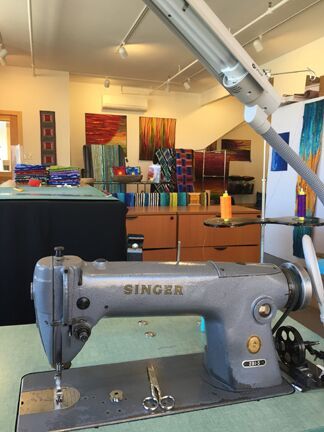
Item 1 – Sewing Machine
Item description: Singer Industrial Sewing Machine
Brand: Singer
Model: 281-3
Year: about 1965
How do you use this item in your practice?
Although I have a Bernina at home I do almost all of my machine sewing on this machine and indeed I design my quilts around this machine.
Why do you use this specific item?
I love my sewing machine. It is an industrial machine I purchased reconditioned in 1983. My machine only goes straight. Indeed it does not even go in reverse, that would have cost me an additional $100 which I did not have in 1983. However, it is delightfully heavy-duty with a wonderful very sturdy table and a large throat.
The machine as currently set up will go up to 3500 stitches per minute and will sew through almost anything. In addition, it has a knee lift which means my hands are always free to manipulate the fabric.
When my studio floated down the river as a result of Tropical Storm Irene, this machine was inside. Luckily the studio stopped just before going over the dam and my DH was able to rescue it. A friend flushed out the system with silicone and the machine was good to go although I did have to get a new motor about six months later.
The machine had come with a clutched motor so that when you turned it on, there was a loud hum. The new motor by XXXXX is a clutchless motor that is silent so I can leave it on all the time.
I also have the industrial table that came with it. This is a large sturdy table that conveniently has a ruler along the edge which lets me measure when I need to without getting up.
I do have to occasionally replace the bobbin winder which I can purchase on-line from Wawaks and the belt which I buy from my local automotive store.
Although the 281-3 is the standard model, they made the same design from about 1940 into the 1980’s and indeed you can still get new industrials that are substantially similar to this one. There are lots of them in use, think of your tailor shops, upholstery shops, sail makers and other places that need fast sewing.
And where did you buy it from?
I purchased my machine from Newman’s Sewing Machine in West Springfield, MA. Because these machines can be used in so many different ways, they suggested that I bring samples of the sewing I intended to do so they could adjust the machine to fit my needs.
Ann Brauer, Thimble
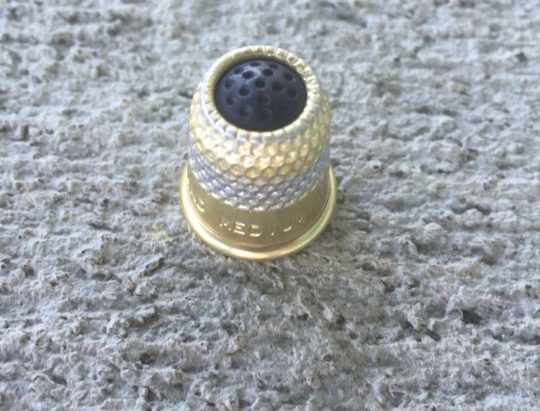
Item 2 – Thimble
Item description: Thimble with magnetic top
How do you use this item in your practice?
I love this thimble for the hand sewing I do. I use it mainly for hand finishing bindings and attaching the looped tape I use for hanging my quilts.
Why do you use this specific item?
For a long time, I used a thimble that I had purchased from Woolworth’s before it went out of business. When I finally wore through the dimples, I was devastated and went searching for a new thimble. The commercial ones I bought had rims around the top which I found to interfere with the rhythm of my sewing. The antique ones I inherited from my mother worked but were not quite the right size.
When I chanced upon these thimbles in Amish country, they were just right and have the rounded top that I find most comfortable. The needles I use are size 10 betweens which are small. I find the magnetic top is very useful.
If I drop the needle when sewing I can pick it up easily. If I need to put the sewing aside for the moment, I just rest the needle on top of the thimble. I even use the thimble to help me pry reluctant needles out of my pincushion.
The only drawback is that the magnetic top will become unglued and eventually it gets lost so I do try to keep a spare on hand.
And where did you buy it from?
I now buy them from Tooltron although there are also others available on the internet.
Ann Brauer, Design board
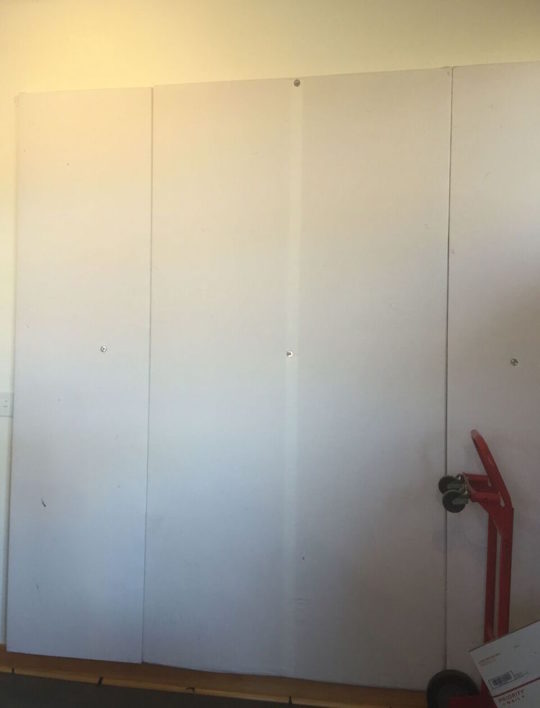
Item 3 – Design board
Item description: Design board
Brand: Self-made
How do you use this item in your practice?
I find that a design board is so crucial to a quilt artist. I pin my work up all the time to see if the quilt is progressing as planned. Sometimes I will pin up test fabrics to see which one works better or to remind myself what I plan to do next.
My quilts can be large and so in my new studio, I have one board that is 8 feet by 8 feet in my work area. This lets me study the quilt from a distance and contemplate it when I come into the studio in the morning. If the quilt is being particularly ornery, it may remain on the board while I try to resolve the issues.
Why do you use this specific item?
When I lost my studio, I needed a new design wall that would inspire me to work again and would not be too costly.
After doing some research I found that many people recommended using the sheets of pink foam board that are readily available from most home supply stores. They can easily be glued together. We covered them with a white flannel sheet which we taped to the back and then mounted them onto the wall with screws and bolts.
Eventually, they will wear out where I pin constantly and will need to be replaced but so far they have lasted for almost three years. I do use a lint roller to remove the threads that accumulate on the flannel.
I have heard of people who make temporary boards using a similar method that they cut to size and even store in a closet or under your bed when not in use. Because my quilts are quilt as you go, I use pins to attach the work in progress although I have heard that if you are just playing with single layers of fabric you can just press onto the flannel.
And where did you buy it from?
The pink foam board came from a home supply store. I purchased a good quality king size white flannel sheet which I cut to size on-line. I used white duct tape to join the sections together.
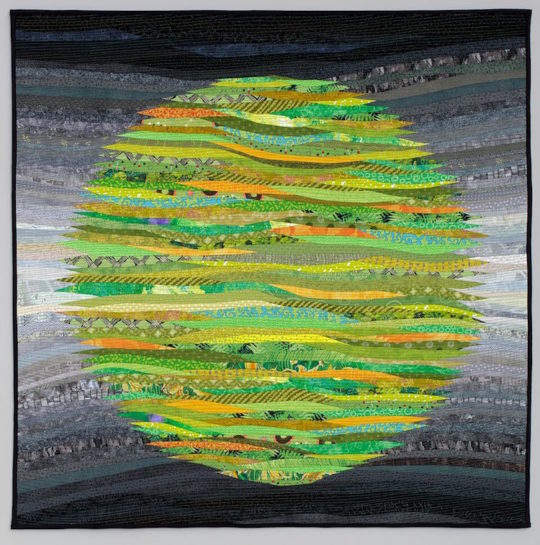
Ann Brauer, Green Circle, 40 x 40 inches, 2015, Photo by John Polak
Item 4 – Hanging display
Item description: Hanging display
Brand: Self-made
How do you use this item in your practice?
When I first started making quilts, as soon as I finished one, I would put it away and only get to see it when I did a craft show. I was always a bit surprised as to the final statement that all of my recent quilts made when I finally got to see them as a group.
One of the benefits of having a studio with wall space is to be able to hang up my most recent quilts and study what I have accomplished. It also allows me to question what I can do differently. Frequently as I look at a recently finished quilt, I will see something in it that I did not anticipate. This can help inspire the next quilt in the series and push my work even further.
Why do you use this specific item?
I am not fond of using a hanging sleeve and slat unless there is a security reason to do so. I find the slat can often add a significant ridge to the quilt that I feel looks awkward and detracts from the quilt.
Instead I stitch a strip of looped tape onto a piece of cloth that I can easily needle. When doing this, I use my sewing machine and increase the tension so you get a nice even stitch. If you don’t frequently adjust your tension, try to make a note of where it was before so you can return it to the proper setting for most of your work.
I then purchase Venetian blinds from a home supply store and cut them apart. The faux wood is already finished and can be cut to size using kitchen shears. I attach these to my wall with nails or little screws and apply self-adhesive looped tape to the faux wood. This means that when I choose to move the wood, I am only left with a few holes in my wall. This method also works well when I do a fine craft show. Customers appreciate the ease of hanging and I can replace sold work easily.
For a more formal presentation I will repeat on the bottom of the quilt. Occasionally the hooked tape does not stick to the faux wood in which case I use a couple of little nails to keep it in place.
For a more elegant solution, Plexiglass can be cut to size. Walker Display systems also sells aluminum slats with hooked tape which can be attached to your wall several different ways.
And where did you buy it from?
I purchase the tape by the roll from U-Line which is on line. I purchase the venetian blinds from my local home supply store.
Ann Brauer, Vacuum cleaner
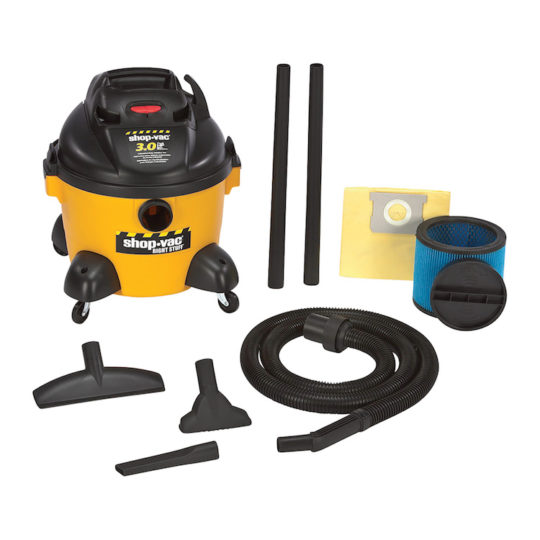
Item 5 – Vacuum cleaner
Item description: Vacuum cleaner
Brand: Shop-Vac Ultra Plus
How do you use this item in your practice?
When I lost my studio, one of things I did before I even had a new space was purchase a new shop vacuum buying the last one in my local store. I use it all the time. It is a lot quicker to sew and let the scraps and threads fall where they may. Then I can just vacuum it clean. I also use it to clean around the bobbin and to get all the little areas where dust accumulates in the studio.
Why do you use this specific item?
While any model and make will do, I consider it important to get one that can handle threads, scraps of fabric and the dust bunnies that working with fabric always generates. I suggest getting one with a bag, otherwise you will create dust as you empty it. I do have a broom and sweep up many of the scraps before vacuuming so they don’t fill the bag as fast.
And where did you buy it from?
I purchased it from my local hardware store—Aubuchon’s in Shelburne, MA although they are readily available. Shop Vacs can be noisy so I try to use it on a timely basis.
For more information visit: www.annbrauer.com
Let us know what your favourite tool is by leaving a comment below.


Great to see a vacuum cleaner as a tool. I finally realised a couple of months ago that I couldn’t keep crawling on the floor to get all my bits but needed something which could cope with thread and fabric pieces (little ones). I’ve ended up with a Dyson hand held wand which can be used one handed, only a few kilos (about 6 lbs) and easy to get long lengths of yarn fro the brush head if necessary.
My favorite tools are my power drill/screwdriver and my dremmel. Between the two of them I can do all kinds of things. And I love my Bernina sewing machine. It’s a work horse.