Carol Shinn: Tool kit

Welcome to another edition of Tool kit, a series of articles where we take a look at some of the favourite tools used by professional textile artists.
Colorado-based artist Carol Shinn is known internationally for her photo-realistic machine-stitched images. Her work is in numerous public and private collections, including the Denver Art Museum and the Museum of Arts & Design in NYC.
In this article, Carol takes us through her step by step guide to using Adobe Lightroom,
var uri = ‘https://impgb.tradedoubler.com/imp?type(inv)g(22851158)a(2813327)’ + new String (Math.random()).substring (2, 11);
document.write(‘‘);
highlighting the benefits and illustrating the results along the way.
Carol Shinn: As a realist freestyle machine embroiderer, one of the most indispensable tools for my work is the computer program Adobe Lightroom. I use Adobe Photoshop too, but save it for doing complex tasks after I work in Lightroom. These programs can be purchased online together, separately, or rented for a monthly fee from Adobe.
var uri = ‘https://impgb.tradedoubler.com/imp?type(inv)g(22851158)a(2813327)’ + new String (Math.random()).substring (2, 11);
document.write(‘‘);
This article will not be a detailed tutorial because there are already so many online, but I will take you through the steps I find most useful.
I bring all my photos into Lightroom first because of its ease for cataloging images and for finding them again later. I can also do many corrections more quickly here than I can in Photoshop, and if I decide later that I have gone too far, alterations done in Lightroom can be returned to the original image more easily than in Photoshop.
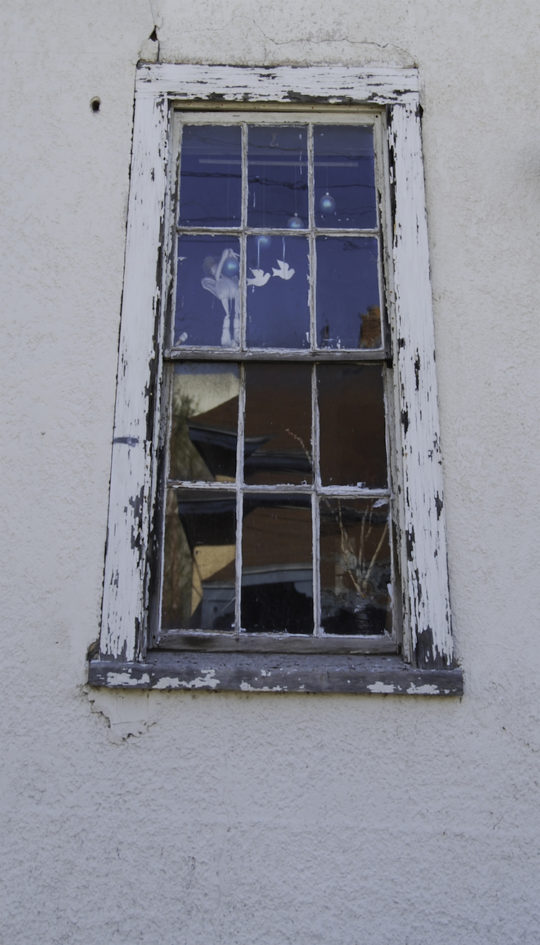
Take, for example, this window shot taken on a trip to Tucson, AZ.
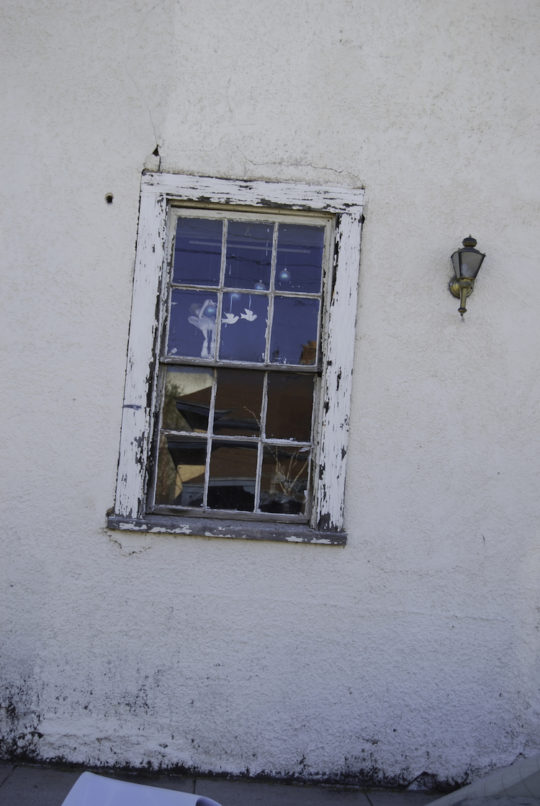
Carol Shinn, Image 1
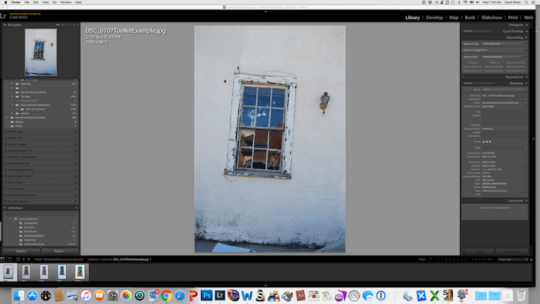
Full lightroom screen
I took it for the interesting break up of the reflection. I was with my husband and was shooting photos right and left, but did not want to hold up our walk with each thing that caught my attention. The result was mediocre, but I wanted to see what would happen with a little TLC in Lightroom.
I often start with the crop tool (upper right dotted rectangle within the program) where I also can correct the sloppy angle of a crooked fast shot.

Crop rectangle
I usually shoot with extra space around what I am interested in so that I have plenty of room for editing, especially tilted images.
While I have the crop tool turned on, I move on down the toolbar and experiment with the things under Lens Corrections (right column, part way down).
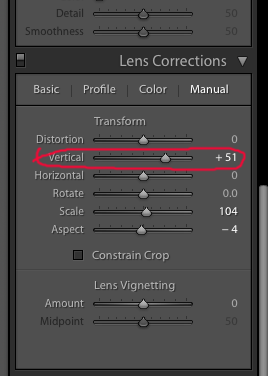
Lens correction box
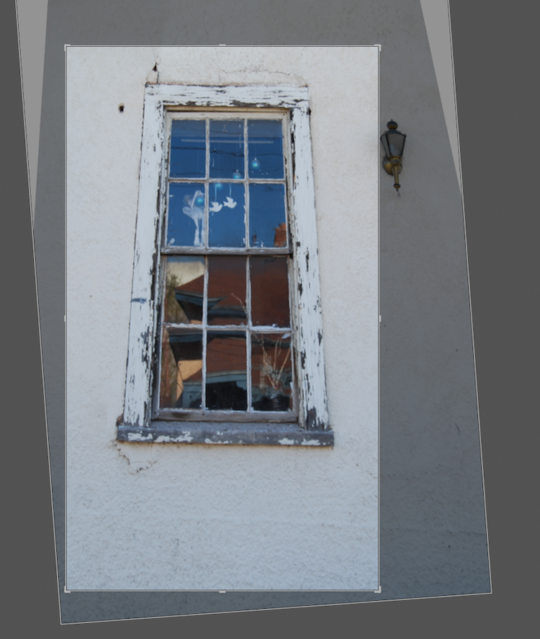
Image with crop lines
I know that objects you look up at often have more visual power or drama than things you look at straight on or see below your eye level. I see if that’s the case with this image by using the Vertical sliding bar in the Lens Corrections section. Too much of this and the window begins to look ridiculously skinny, so just a little helps a lot.
I also know that when I stitch, the image will become squatter, so I leave it slightly too tall. If I were not stitching, this too tall exaggeration could be fixed with the Aspect slider bar, also in Lens Corrections. Cropping gets rid of the lantern on the right, and some of the clutter at the bottom.
Carol Shinn, Image 2
Getting rid of the Christmas decorations is a more complex operation, so I go up to the top. Under Photo, I choose edit in Photoshop.
var uri = ‘https://impgb.tradedoubler.com/imp?type(inv)g(22851152)a(2813327)’ + new String (Math.random()).substring (2, 11);
document.write(‘‘);
It’s good to save your image immediately in Photoshop with a slightly different name so that you don’t directly work on the original. This way you keep each step along the way in case you change your mind at any point.
You can easily go backwards in Lightroom, but in Photoshop you only have a limited number of steps you can backup with, and once you save your image to leave Photoshop there is no going back unless you have saved past versions.
In Photoshop I can get rid of the decorations using the paintbrush tool or by capturing adjacent sections of the blue windowpane with the lasso tool, and using them as a cover. After this is done, and saving again, I go back to Lightroom and punch the image with the Basic tools. Sometimes I use nearly all of them.
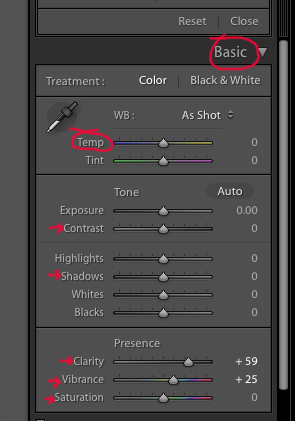
Basic Box
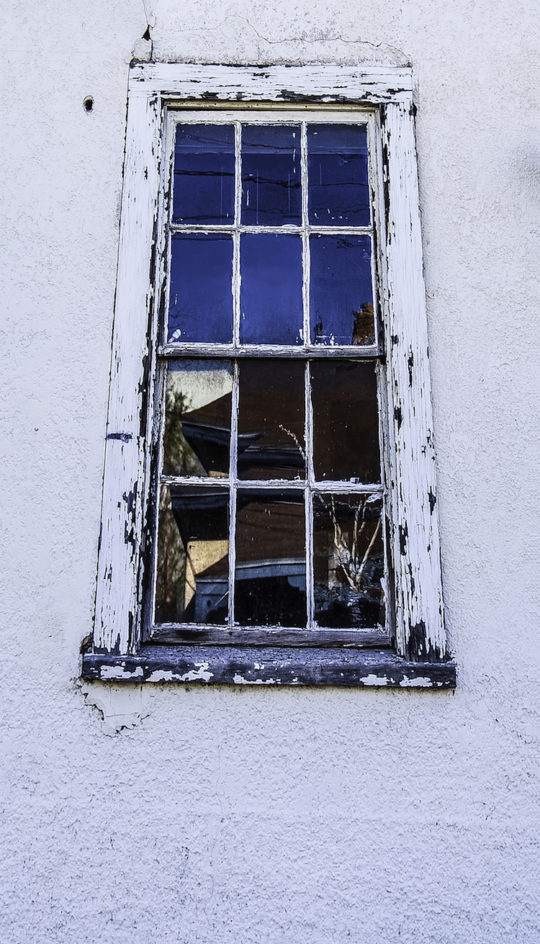
In this case, I increase the blue a little (Temp slider bar) as well as use Contrast, Shadows, Clarity, Vibrance, and Saturation. Then I sharpen the image a lot and save it again.
Carol Shinn, Image 3
Finally, I like to see what the Presets on the left side of the screen will do. I ignored these for a long time, and then one day found them and started having fun. Even if you think the choices are too extreme, they can be the source of ideas.
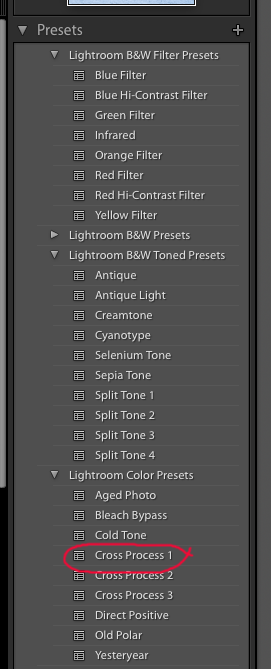
Presets on left
You can see your image change in the thumbnail at the top of the preset column, or click on them individually to see what happens on your main image. You can undo these in History (also in the left column), though I don’t know if there is a limit here on the number of changes it keeps.
You can always click Reset (lower right) to return to the last titled version that you saved. I choose Cross Process 1 for my final version. Then I crop off some more of the extra at the bottom.

Carol Shinn, Image 4
I take it back to Photoshop, save it, and create the final size for printing out on heat transfer paper.
Remember to reverse the image with Flip Horizontal in either program because the transfer must be printed backwards for the final print on fabric to be the right direction.
Embroidery is next!
Get Lightroom as part of the Creative Cloud Photography plan for only £8.57/mo incl. VAT
var uri = ‘https://impgb.tradedoubler.com/imp?type(inv)g(22851158)a(2813327)’ + new String (Math.random()).substring (2, 11);
document.write(‘‘);
For more information visit: www.carolshinn.com
Got something to say about the techniques, materials and processes used by this artist – let us know by leaving a comment below.


This is really a wonderful “how to” article. As a small one-person shop promoting the Fair Trade products of artisans from Central Asia, I can’t always afford to hire a professional photographer to photograph products or work with some of the Central Asian images that arrive by email or social media. This is definitely a “keeper” article. Thanks so much for sharing this. I’m saving it “marketing education” file right now.
I was fortunate enough to take a workshop with Carol just as her book was being released. It was an outstanding experience and, unlike so many other workshops, continued on with improving my work following these classes. Unfortunately, I don’t believe Carol was using Lightroom at the time. I have only used Photoshop in my work, but I can see where Lightroom can be even more useful if combined with PS. I think I will definitely have to check this out!
I also took a thread painting workshop with Carol about 10 years ago and fell in love with the process. Faces of humans and animals are my forte. It has led me into Oil painting and then interpreting in thread. I thank her so much for a great introduction to this art form. It has been a big part of my art life.